The North African campaign during World War II was a battle of supply. Between 1940 and 1942, both the Axis powers and the Allied powers achieved significant victories, which allowed them to continue their campaign for hundreds of miles and across many countries.
Inevitably, the supply tether was reaching its limits, and the advances ground to a halt. The battle of El Alamein found the Axis powers of Germany and Italy at the end of a very long supply line. On the other side, the Commonwealth forces were closer (within 60 miles) to their main supply bases around Alexandria.
This distance and accessibility to their supplies set the fundamental conditions of the battle which was to follow.
World War II Moves Leading Up to the Battle, 1940-1941
After the fall of France, Britain was in a very precarious position in northern Africa. Its main army, exhausted and bereft of equipment, was in Britain after being evacuated from the beaches of Dunkirk. France was out of the war, and Italy was looking for opportunistic victories to take control of the Mediterranean.
In 1940, Britain had a skeleton force in Egypt facing a much larger Italian army. But the Italians struggled to equip and supply their forces, even under the best circumstances. They were not prepared for modern, mechanized warfare. When the Italians eventually launched an offensive in late 1940, it quickly ground to a halt.
In December 1940, General Richard O’Connor, commander of the Western Desert Force, launched a counterattack that was spectacularly successful and resulted in the capture of over 100,000 Italians. This success, however, caused Mussolini to ask Germany for help. German General Erwin Rommel, who became known as “The Desert Fox,” landed with two divisions in the Libyan port of Tripoli in March 1941.
The British, meanwhile, gathered their forces in a futile attempt to defend Greece. This created an opening for Rommel to counterattack as far as the Egyptian border in April 1941. This is where his lack of supplies finally forced him to stop his advance.
Counterattacks and Military Moves, 1941-1942
After the fall of Greece, the British began rebuilding their forces and launched Operation Crusader in November 1941. This operation resulted in attritional warfare – grounding down the German and Italian defenses. This forced them once again to withdraw to the lines they had held in April.
In early 1942, the resupplied Axis powers mounted yet another counterattack. This attack regained half of the territory that they lost after the Crusader battles. In May 1942, they engaged the British fixed defenses in the desert known as the Gazala line and flanked it. This led to a collapse of British forces that pushed them back into Egypt by July 1942.
These last defeats caused British Prime Minister Churchill to remove General Auchinleck from command of the theater and General Ritchie from command of the 8th Army. In August, General Alexander took over theater command, and General Montgomery took over command of the armies on the ground.
The British established defensive lines in a narrow strip of land between the Qattara Depression, which was not passable by motorized vehicles, and the Mediterranean Sea. In mid-August 42, Rommel took one last stab at breaking this line. This resulted in the battle of Alam Halfa (sometimes referred to as the “First Battle of Alamein”). His attacks failed to break carefully prepared British defenses.
For the next six weeks, both sides dug in and prepared extensive minefields and fixed defenses. Rommel’s army was largely immobilized because of a lack of fuel at the end of their thousand-mile supply line. Fuel shortages severely constrained his ability to pivot and react to British moves.
These were the conditions in place as Montgomery considered how to break the German and Italian defenses.
Desert Doctrine: Tank Warfare and Design
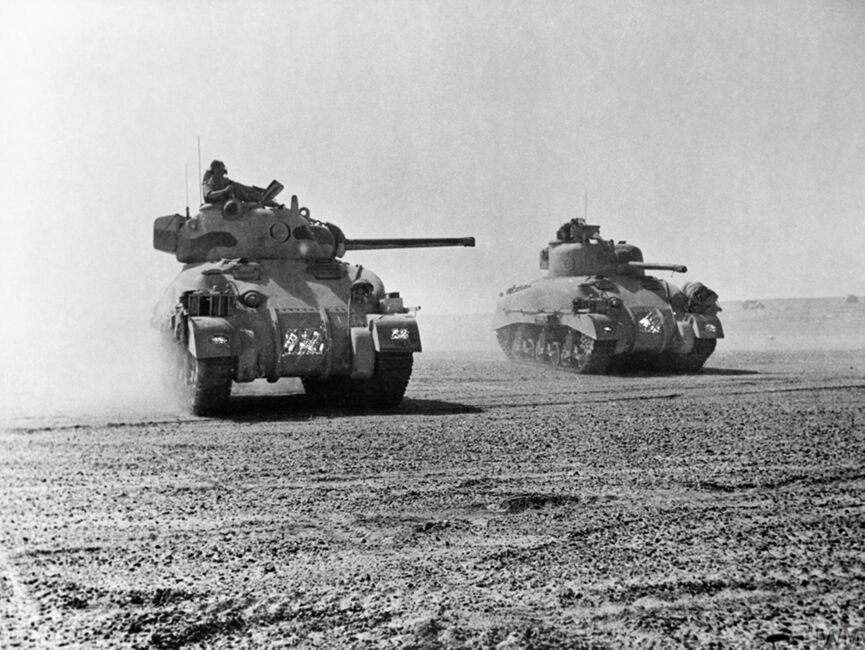
The tank is often referred to as the Queen of the Desert.
This was certainly the attitude of the British generals during the early battles of the desert war. The Germans, however, developed a far more sophisticated, combined arms doctrine that often shredded British armored formations, despite the Commonwealth’s numerical superiority.
One of the technological challenges of early World War II armored warfare was that tanks were still very much a trade-off between limited engine, power, armor, thickness, and gun size. Mounting a large gun in an underpowered chassis was something that both sides struggled with until late in the war. Creating an armored box capable of resisting the impact of large-caliber shells continues to bedevil tank designers to this day.
The British solution was to develop two different types of tanks. One type was heavily armored and slow and designed to take punishment. Its role was very similar to the tanks of World War I: to accompany the infantry in assaulting defended positions.
The other type, the cruiser tank, was fast and designed to fight other tanks. Both designs shared a rather meager 40 mm gun armament.
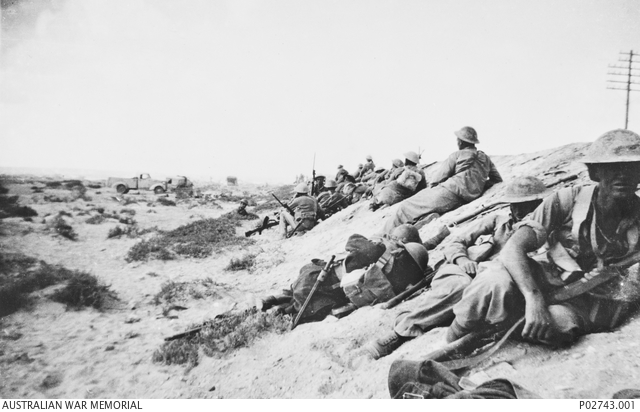
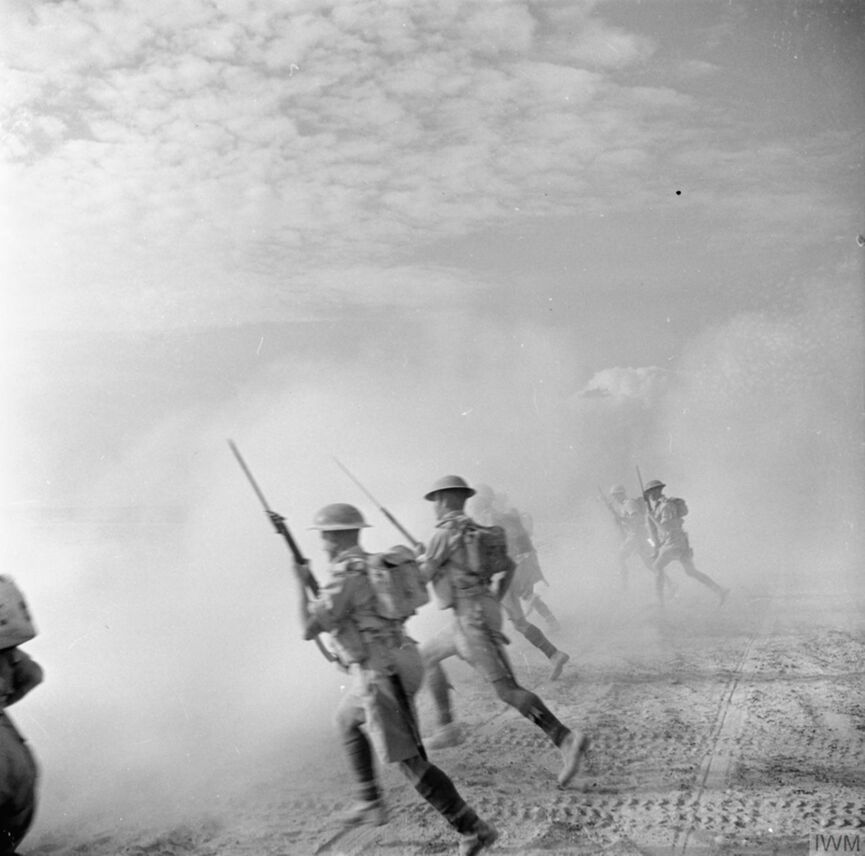
No. 1 Army Film and Photo Section, Army Film and Photographic Unit
Gun Armament Complications
The Germans had the same problem. They gradually increased the armament of their mainstay Panzer IIIs from the rough equivalent of the British guns, to a more powerful 50 mm gun. Also, their Panzer IVs had a low velocity 75 mm gun, and neither of these guns could effectively take out the heavy infantry tanks of the British.
German methods instead included luring the British tanks into batteries of concealed anti-tank guns.
The most notable and deadly of the east was the famous 88 mm. The problem with this strategy is that these guns could be hard to hide in the vast emptiness of the desert, unless well dug in. An 88 was over 8 ft. tall on its traditional carriage and, once emplaced, was difficult to move, making it vulnerable to artillery fire or infantry attack.
Before Alamein, however, the British armored formations rarely included intrinsic infantry or artillery capable of handling dug-in 88s. Instead, repeatedly, British tanks engaged in frontal attacks against German anti-tank positions and lost hundreds of tanks.
By the time of the El Alamein battles, the British had learned German doctrine. When he arrived in the territory, Montgomery started an intense training regimen for the new troops arriving to replace the losses suffered over the previous six months of battles.
Assembling for Attack
Montgomery expected to face nests of German anti-tank guns and liberally employed artillery and infantry before they would expose their tanks to German fire. The British reformed units of their own heavier 57 mm anti-tank guns specifically designed to counter German armored attacks.
While the British still lost a lot of tanks in the coming battle, they inflicted similar casualties on German armor, which the Germans found impossible to replace.
By October 1942, the positions around El Alamein resembled the fortifications of the western front from World War I. Vast minefields numbering in the millions of anti-tank and anti-personnel mines were laid across both sides of the line. Strongpoints dotted the landscape. It was thoroughly unlikely that either party would achieve a quick breakthrough.
Montgomery recognized his chief advantages lay in his accumulated supplies. He could sustain immense artillery barrages over an extended period to reduce enemy strongpoints. His forces had ample fuel and were therefore much more mobile than his opponent’s forces.
He could therefore probe the entire line and search for weak points to exploit. Rommel would find it hard to respond because he had to conserve fuel and could only reposition his mobile reserve a few times before their tanks ran dry.
Montgomery also had a significant advantage in numbers. The Germans and Italians had about 500 tanks and 100,000 men. The Commonwealth forces were about twice that in both men and tanks.
The Desert Air Force also enjoyed a significant numerical advantage over their German and Italian counterparts. Another part of the learning process was the development of an effective ground support doctrine that would prove decisive, close-by support of troops. This was coupled with large amounts of supply convoys and armored formations preparing to attack.
Both capabilities would prove crucial at critical junctures in the upcoming battle. This would also be the first battle where the Allies enjoyed significant air superiority.
The Battle Begins
On October 23rd, at 9:40 pm, the British launched a massive artillery barrage with over 1000 tubes. Under the barrage, groups of sappers crept forward to clear pathways through the minefields, and to open channels for the tanks and infantry following them.
The minefields proved much tougher to get through. They were deeper than expected, and by dawn only about half of the infantry and none of the tanks were in their planned positions on the far side of the minefields.
The main attack was initially along the northern end of the front. The goal was for XXX Corps to establish itself along a line of ridges and force the Germans to exhaust themselves in counterattacks. Meanwhile, along the southern part of the front, the 7th Armored Division staged a feint to draw off as much of the German armor as possible in that direction.
Fortunately, the Germans were slow to respond to the British incursions. Rommel was in Germany, recovering from a stomach ailment. His second in command, General Georg Stumme, went forward to survey the British advances. While there, his car came under fire and he died of a heart attack, leaving the Germans leaderless at a critical moment This bought the British forces time to secure their forward positions.
It was not until dusk on October 25th, after Rommel had hurriedly rushed back to the battle, that the first serious German counterattacks occurred. The 15th Panzer Division and the Italian Littorio Division counterattacked out of the kidney-shaped feature in the northern half of the front and engaged the tanks of the British 1st Armoured Division.
Both sides suffered significant losses in this attack, but the lines didn’t shift.
Days Into the Battle
For the next several days, both sides slugged it out in attacks and counterattacks. Both Rommel and Montgomery probed for weak points in each other’s lines with extensive casualties on both sides. Montgomery shifted his attacks briefly to the southern end of the front, causing the Axis forces to weaken their center to defend the attacks along the flanks.
On October 29th, Montgomery, frustrated with the slow advance, ordered the 9th Australian division to attack along the coast road to seize a critical Axis position there. This cut off the Axis forces along the coast.
This attack forced Rommel to commit his reserve, the 90th Light Division, to relieve this position. While the Australians were driven back, the 90th Light was now fully committed in the north.
Montgomery realized that the position of the 90th Light weakened the line just to the south. On November 2nd, he launched Operation Supercharge with the 2nd New Zealand Division toward the southwest. Following hard on the heels of the New Zealanders was the First Armoured Division, which was tasked with engaging any Axis armor that might make an appearance.
This attack went through two Italian divisions that only had 65 tanks between them. Aerial attacks and 360 artillery tubes prepared the ground for the New Zealanders.
Despite this effort, a German anti-tank gun line decimated the British armor. The attacking forces failed to break through the thin defensive line. It took another two days and additional infantry reinforcements to overcome the position.
The attack had its intended effect. Despite orders to the contrary from Hitler and Mussolini, Rommel determined his forces were no longer capable of effective resistance and ordered a partial withdrawal starting the night of November 3rd. By the 4th, this had become a general withdrawal to the West.
The Aftermath
Commentators have often criticized Montgomery for not engaging in a more aggressive pursuit of his defeated enemy. At the time, the Commonwealth forces were exhausted from almost 2 weeks of constant, intense combat.
The weather also turned against him and grounded his air units. This sped up the retreat of the Axis forces and slowed the advance forces that attempted to cut off Rommel’s retreat.
On November 8th, Rommel’s fate was sealed when Allied forces, including the first significant deployment of US troops in the European theater, landed at the other end of the Mediterranean Sea in Morocco in Operation Torch. Over the next six months, the converging Allied forces gradually isolated the German and Italian troops in Tunisia, midway between Morocco and Egypt.
In May 1943, despite massive reinforcements, over 250,000 of them surrendered to the Allies. In the battle’s aftermath in Britain, church bells rang out for the first time since the beginning of the war to celebrate the victory.
Churchill’s epitaph for the battle was, “Before Alamein, we never had a victory. After Alamein, we never had a defeat.” It was the beginning of the end for the Axis in Africa and, coupled with the Soviet victory at Stalingrad a few weeks later, marked the beginning of the end for Nazi Germany.